How to Optimize your Process Builder and Quick Action Speeds

Process Builder and Actions (Quick Actions) are two of my favorite declarative tools that Salesforce has.  I’ve had a few posts on Actions and how powerful they can be when you add in Process Builder and even sometimes Flow.  I’ve also specifically had a few posts on how to write your Process Builders so that you can optimize them for speed (read here).  Now, this idea on today’s post does go against the concept of having One Process Builder per Object, but I think it does pose a good argument against it.  That argument is SPEED!

I’ve seen scenarios where we want to use Actions to create record(s).  What if you want to create an Action that creates an Opportunity, which in affect you want to have the Opportunity Team dynamically updated, and maybe a few Tasks automatically assigned to the new Opportunity Owner?  This is all stuff that a simple Process on the Opportunity Object will run perfectly, right?  Yes.  However, that automation can bring your Action to a crawl.

The Influence

The inspiration for this post comes directly from some of my work in Apex.  I discovered what Future Methods were when writing some really fun code a while back.  In short, it just attempts to perform the action in the future, as opposed to during your current transaction (creating or updated a record).  This allows you to bypass some limits that you might have otherwise had.

The Solution

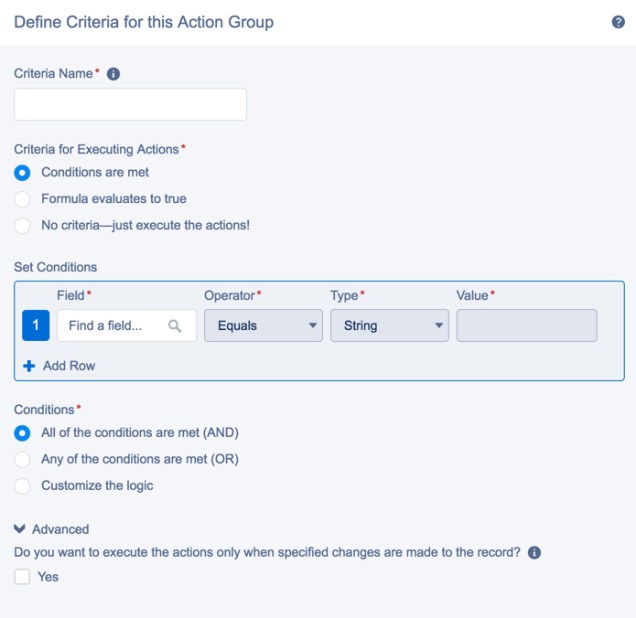
By moving our Actions from the Immediate Actions to Scheduled Actions and placing the Set Time to 0 Hours After [date field] to ensure that it fires almost instantly after the record creation or update.

Schedule 0 Hours.png

After setting the time, add in your Actions.

schedule0hours

Advantage

The real advantage here is speed.  By being able to delay certain actions from taking place in the transaction, you’re able to increase your save times.  The result is a faster experience for your End Users.  I don’t think I need to add anything to that 🙂

flash-2.png

Disadvantages & Considerations

I’m aware that the list of disadvantages for the one advantage might comes off like one of those drug commercials with 30 seconds full of side affects… but here we go 🙂

The biggest disadvantage to me is that the record(s) that you might be creating or updating won’t be “ready” instantly.  If the User using the Action is also the one whose expecting some of those Actions to happen automatically, then maybe it isn’t the best solution for them.

As I mentioned at the start of this post, this does go against the One Process Builder per Object design pattern.  If you have a scheduled action, you’re not able to do the “evaluate next” inside your Process.  That post, like this one, is not a mandate that you must follow.  As the Admin/Dev running your Org, you should be able to make an educated decision on what is best for your scenario.

The last consideration around implementing this is understanding its impact on testing.  It is much harder to test something that happens in the future.  This affects your manual testing and any Apex Test Classes.  I would be surprised if you didn’t have any scheduled actions in your Process Builders and Workflow Rules… so it isn’t like this type of action isn’t being used today by many of us.

Putting it all together

The goal of this post is to not say you must use delayed Process Builder actions.  It is simply to add one more tool to your tool belt for when you’re working with Process Builder and Flow.  These concepts are not one-size-fits-all… adjust the concepts to fit your Org.

Five Best Practices for Building a Clean Visual Flow

We’ve all been there, where you’re learning to write your first Visual Flow.  The main thing we’re focused on is just making sure that it is functional.  That’s fine while you are in your Sandbox developing, but once you’ve got it working correctly you need to make sure your Flow follows these five best practices.

Elements are Organized

One of the top rules for writing code is using proper indentation.  David Liu (SFDC99) is known for his love (or OCD) of clean code.  Visual Flow’s equivalent to indentation is the alignment of the elements into a clean format.  Think of it like you’re having company over – you would make sure you cleaned your house up before they arrived.

Your Flow should be very easy for you to follow the Flow Elements from start to finish without having to strain your eyes.  Keeping it clean also lets your Flow be easier to make future updates to it.  You don’t have to take apart your Flow to make sure you didn’t miss anything on your update.  So, be sure you spend the extra minute or two to make sure your Flow is sharp looking!

Bad

Messy Flow

Good

Sharp Flow

Naming Convention

In the developer realm, camel Case is the standard.  In Flow, we’re stepping into the developer world without really having to write code.  It obviously isn’t required that you use camel Case as your naming convention, but it is important that you follow a consistent naming convention.  If you don’t, your Flow will be much harder to read.

camel.png

Variable Names

In addition to your naming conventions, you need to make sure your variable names make sense.  I have opened up way too many Flows that use variable names that are not clear. If someone has to do some detective work to figure out what your variable is doing, you need to rethink your variable naming.  Variable naming can often be hard to do correctly, because you have to summarize the function of the variable into a small concise variable.

DoCaseId — Don’tRecordId

Why? RecordId is very generic and does not tell me what Object it is referring to.  I would have to go find where the value was assigned to see the Object it is the Id for.  CaseId is clear and I don’t have to do any research to figure out what it is.

Fault Messages

When your Flow fails its important for everyone to be alerted.  If you’re a Solo Admin, then you can technically get away without using a Fault Message, because Salesforce’s Email Alert will go to you.  However, if you have more than one person developing in your Org, this is a requirement! By setting up a Fault Message, you can easily alert all of the Admins and Developers of the issue.

It is also important to use multiple Fault Messages inside your Flow.  You’re able to customize the Email being sent out to provide specific information that pertains to that particular part of your Flow.  This will help you as you troubleshoot your Flow.

Fault Message


Descriptions

Make sure you use Descriptions in your Visual Flow.  This goes along with having your Flow Elements all aligned and easy to read.  You want your Flow to be easily digestible.  It is important to not write blatantly obvious Descriptions, just to write them.  You want to make your Descriptions helpful.

Anytime you have to do something unique inside your Flow you should include a Description to explain what, and more importantly why.  An example would be when you use a Formula in your Flow.

Description.png


Recap: Think long term when you’re building your Flows (or anything).  Just like you want to create a good User Experience for your End Users, make sure you create a good one for the Admins & Developers that are maintaining the Org.  None of these best practices require a significant amount of time to follow, and the benefits of having a clean Flow will be worth the extra effort!  And if you’re still reading, make sure you check out my The 6 Most Common Visual Flow Errors to Avoid.


Understanding how to write Process Builder Criteria

I am working on a mini-series related to understanding Bulkification (related to Process Builder and Visual Flow).   So, you’re going to see a theme of posts like this and Building your Process Builder for Optimum Performance and Bulkification where I focus on some design considerations with Process Builder and Flow.  The reason behind these posts are because Process Builder and Flow are extremely powerful tools that give those previously developer-only powers to the masses.  And as we all know… with great power comes great responsibility!  So, lets do our part to make sure that we build our Process Builders and Flows in a way that would not cause developers headaches.  I’ll cover the basics of the different types of criteria, and then go over why it matters that you take building criteria seriously.

spiderman1.jpg

When setting the criteria for our Process Builder to fire, our options are:

  1. Conditions are met
  2. Formula evaluates to true
  3. No criteria – just execute the actions!

Lets dive deeper into each of these and talk about when and why would use them, and some of the common mistakes that are made around these.

Conditions are met

criteriapb.jpg

Using this as our criteria gives us a few more options than what we used to have with Workflow Rules criteria.  Now, we have operators like Is changed and Is null that were previously unavailable to us.  Outside of those new options it is essentially just a cleaner UI.  Don’t forget about the ability to make your Value a Formula (see condition #3), you can use awesome functions like PRIORVALUE and grab in cool System things like your Custom Settings!  Speaking of, Jennifer Lee has a great post on using Custom Settings in Process Builder that is a must read for anyone not familiar with Custom Metadata or Custom Settings!

Conditions.jpg

So we can pretty much do pretty much everything inside this criteria option… but what are the pitfalls that we will run into?

Forgetting to check the Advanced checkbox.

I really wish that Salesforce didn’t hide this section, it needs to be front and center!  I feel like this is one of the biggest errors that people make when building a Process Builder.  It is often overlooked until you’ve got a Process Builder that is creating a record or sending an email, and you realize that you’ve just had six emails get sent out to a Client!criteriaadvanced.jpg

Using Is changed

While I absolutely LOVE this operator that Salesforce gave us within Process Builder, the fact of the matter is I have seen tons of Success Community questions where people get stuck on this.  It isn’t documented very well that Is changed will ONLY run on Updates.  This will not run on Create.  That means, you’re up a creek without a paddle if you’re trying to build your Process Builder to only fire when a value changes, but also have it work if that field has been filled out on create.  If anyone has a clever way that they’ve found to bypass this issue, I’de love to hear it.

Formula evaluates to true

criteriapb2.jpg

While not as simple as the conditions are met option, this gives us the ability to do everything that we would want to do.  The problem is that this often is more fragile than the rest.

API Field Name Changes

This option unfortunately will NOT update your formula if you have to change the field name.  Keep this in mind, because just about everywhere else in the UI this is something we’re accustomed to.  You will however be greeted with a lovely error message anytime you try to Clone ur Update your Process Builder

errormsg.jpg

Is changed for new records works!! kinda…

Here is a simple example of how you could use the formula evaluates to run on new records and still run ischanged on updates.

We essentially have separated our criteria into On record create and On any updates.

(ISNEW() && NOT(ISBLANK(field)) || ISCHANGED(field)

In my below example I only have to use ISNEW() because the Case Status is always filled out.

ischanged.jpg

No criteria – just execute the actions!

criteriapb3.jpg

This should not be used unless you have a very good reason.  Just because we have a simple action does a Record Update and nothing else does not mean that we want it to always fire on every edit.  This means that every single edit our Process Builder is firing.  How many situations can you think of that actually require a Process Builder to fire every single time?  Don’t be a lazy Admin and use this option just because you can!

Why does this matter?

Because of how Salesforce ‘bulkifies’ our Process Builders and Flow!

bulk.jpg

https://releasenotes.docs.salesforce.com/en-us/winter16/release-notes/rn_forcecom_process_bulkification.htm

The issue is that as we continue to customize an Object with more and more Process Builders and Flows you keep adding to the string length!  Remember that every simple Record Update in your Process Builder, no matter how simple, counts as an actual query that will be added into that ‘bucket’.  Previously with Workflow Rules you never had to worry about those simple Field Updates running on every edit of the record, but now as we try to keep our Process Builders and Flows bulkified it becomes an issue!

By fully understanding our Process Builder’s criteria (and using it correctly), we are able to cut back on the extraneous actions.  This results in two big things:

  1. Reduced process time when you hit Create or Edit a record
  2. You’re more bulkified due to a decreased the number of queries

Which means you’re now the hero of your Org!

hero.jpg

The “One Process Builder Per Object” Design Pattern

Ever since the Summer ’16 release notes dropped, the Salesforce Community has been going ecstatic over the one and only Process Builder improvement.  The Community is so excited with this one feature, that I have not seen anyone complain about Process Builder only had one improvement.  The reason is this improvement is a game changer in the Process Builder world, and it will change the way that we build our Process Builders.

ReleaseNotesImageEvalNextCriteria

Note: Evaluate the Next Criteria has one limitation currently.  It doesn’t work with Scheduled Actions (which makes sense).  So, if your Process Builder has a Criteria that includes Scheduled Actions, you’re out of luck for continuing any further down the Process Builder (and that particular Process won’t really apply to this Blog Post).  So keep in mind during this post that any Process Builder with a Schedule Action can’t be included.

Unable to do Scheduled Actions

One Process Builder to Rule them All!

TheOneRing.jpg

You’re probably asking yourself why would we want to build an extremely long Process Builder?  This idea comes from attempting to mirror the Apex Trigger best practice and design pattern.  Yes, there are additional benefits to this design pattern with Apex as opposed to Process Builder, but the main points still ring true.

#1 – Keep it Simple

No longer do you need to search through tons of Process Builders trying to understand what all is going on behind the scenes.  You’ve got all of your logic in one spot for you to look at (excluding Scheduled Actions).  Heck, Salesforce even mentioned how it makes it easier in the release notes!

release notes.jpg

#2 – Control Your Order of Execution

pemdas.jpg

So, just like with your Order of Operations, it is important to be able to know what order you execute Process Builder actions.  However, unlike the Order of Operations where we can follow a consistent process every time… with Process Builder we don’t know which order our Process Builders will execute in.  If we have 15 different Process Builders on the Cases Object, then we have no control over what order they will be executed.  It is quite scary when you realize you’ve got zero control over the order your Process Builders run in!

With executing multiple criteria in a single Process Builder we are now able to consolidate all of our Process Builders into just ONE.  And, in our one Process Builder we can drag and drop our actions around into the desired Order of Execution.

For a quick summary, creating one Process Builder to rule them all will allow you to simplify your Process Builders for each Object, and will allow you to have consistency in the way your actions are fired.  Do you have to do this?  No, there is nothing stopping you from continuing to build Process Builders in the same fashion that we previously did.  But, I would ask you to consider thinking about incorporating this design pattern into your Orgs once it becomes available.

Salesforce Admin vs Consultant, Whats the difference?

Before I took the plunge into the consulting world, I was an internal Salesforce Administrator and Developer working in Sales Operations.  I was in charge of a 200 user Salesforce org.  We used both Sales and Service Cloud, and we even had two Customer Communities.  Since my jump to become a Consultant I’ve noticed that some skills transferred over and others didn’t.  In this post I’ll make 5 comparisons between a Salesforce Admin/Dev to a Salesforce Consultant. Continue reading