Your company just decided that they are going to purchase a Salesforce Community! You are bursting at the seams to to get going and make an amazing Community. You just got an email from your favorite department (legal) and they mentioned that everyone who logs in to the Community must first accept your company’s Terms & Conditions. Also, if the Terms & Conditions change that Users will have to accept them again. Oh boy. How can we do this? Well, as of Winter ’15 Salesforce has added a great tool called Login Flows. Now you can do this with just a few clicks!
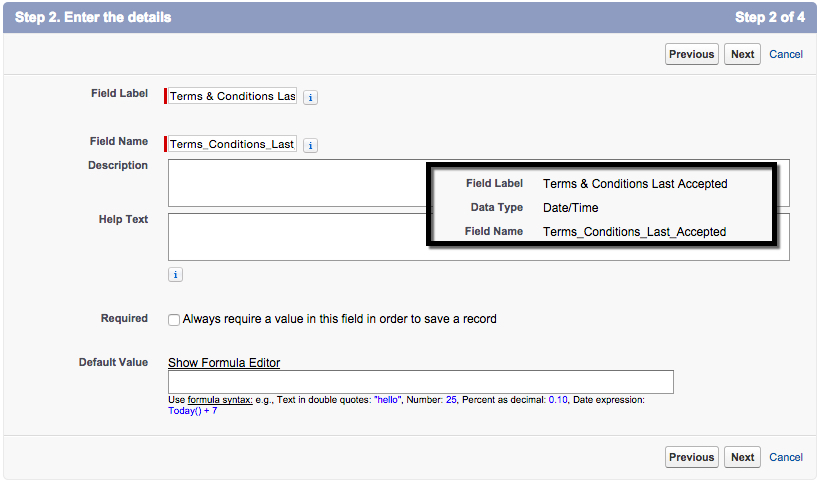
Lets talk about how we will want to design this. Because your Terms & Conditions could change anytime during the day, we will want to use a Date/Time field. Lets call the field Terms & Conditions Last Accepted (and place it on the User), then we will be able to track the last time each Community member accepted the Terms & Conditions. Yes, we could create an object or record to reference for the Terms & Conditions in our Flow, but it actually would be easier to use Display Text on a Screen element and manually change a Flow Date/Time field that we reference against the Last Accepted field.
Login Flows are a bit weird as you don’t get your own naming convention for some of the input variables you want to use (the Id for the User logging in). Reference the full list of of input and output variables that are available to you here.
One tip from a Salesforce MVP that was demoing Login Flows, is that you should always keep a separate User Login that you can use in the situation that your Login Flow messes up… not that your Flow would ever do such a thing! Lucky for him, Salesforce’s amazing support came to the rescue and let him back into his Developer org!
Lets get started! Create a Custom Date/Time Field on the User. Label this field Terms & Conditions Last Accepted (Setup | Customize | Accounts | Fields)
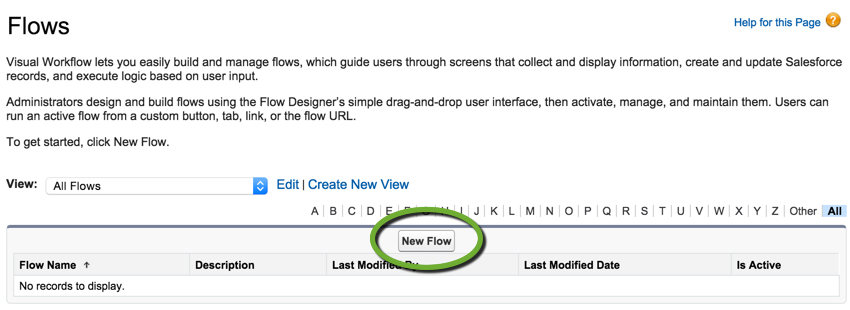
Now that the only field we needed to create is created… lets go to create a New Flow! (Setup | Create | Workflows & Approvals | Flows)
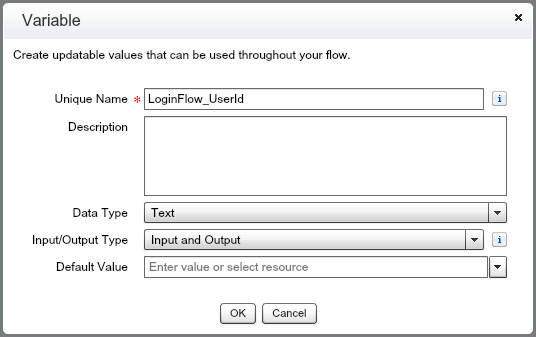
For this Flow we need to create one Text Variable and one SObject Variable. Call the variables LoginFlow_UserId and User.

Does your Explorer tab look like this?
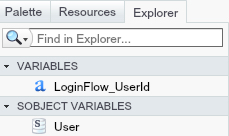
If yes, lets start to build out the Flow!
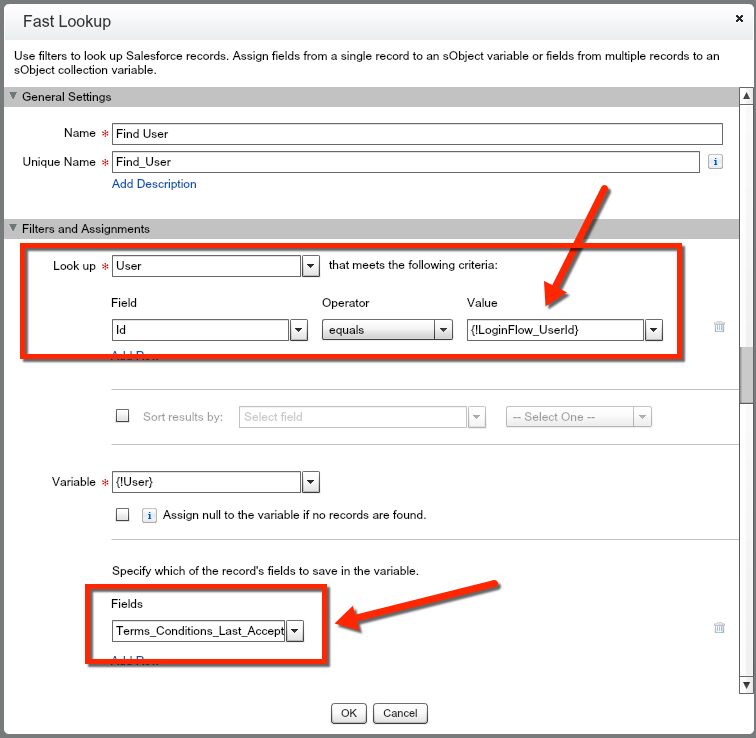
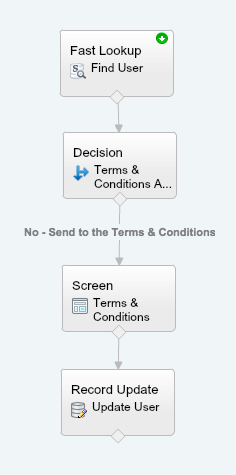
Lets start with dragging in a Fast Lookup. We want to do the Look up on User Id equaling the LoginFlow_UserId. Remember, your variable MUST be labeled this exactly or the User Id will not pass into your Flow. After we have done that, we want to grab the Terms & Conditions Last Accepted from the User attempting to login to Salesforce.
Now that we have the User’s data, we want to determine if they have accepted the Terms & Conditions or not. So lets create a Decision element. Keep in mind – this is one of the two areas you will have to update when you make changes to your Terms & Conditions. You need to manually update the Date/Time Value that you are basing your Decision off. For the Resource that we will use in this Decision, we want to go inside the User variable and grab the Terms & Conditions Last Accepted. Now we can setup our filter criteria to determine if the User has already accepted the Terms & Conditions, and if they have we want to let them login without going to the Terms & Conditions Screen.


For those Users that have not yet accepted the Terms & Conditions, we want to send them to a Screen where they can view the Terms & Conditions and say they accept them. This is the second area that you will have to manually update anytime there is a change to your Terms & Conditions. So lets drag a Screen into our canvas and get started!
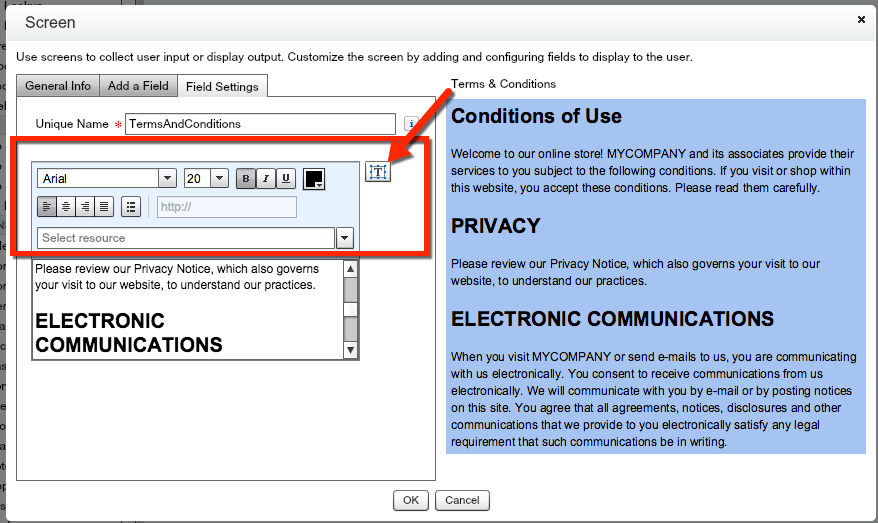
We want to first add in Display Text to the Screen

Next, we want to make the Display Text look good. If you hit the box in the top right corner (where the arrow is pointing), it will take you to an advanced editor where you can format the Display Text. You could have a summary with a link to your company’s full Terms & Conditions if yours are too big for this use case.
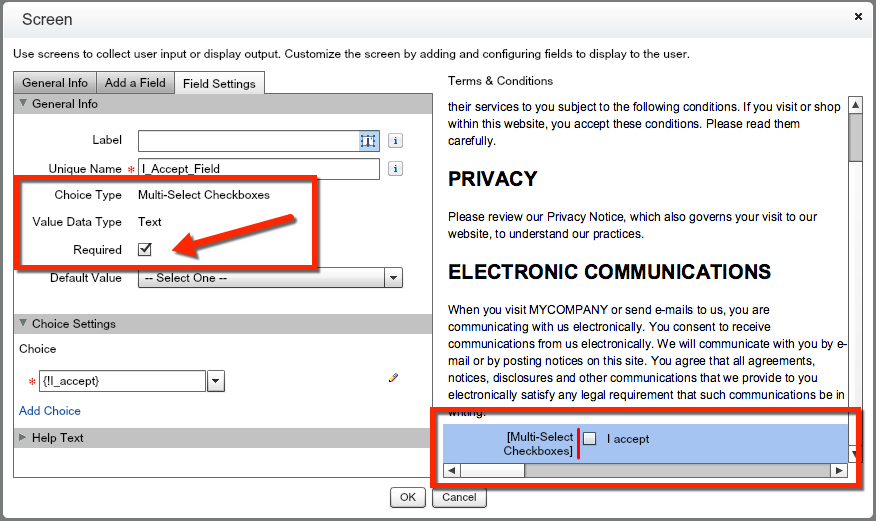
Now that we got the legal jargon taken care of, we need to create a Multi-Select Checkbox and add that below our Display Text. For the Label, keep it blank so that you have no excess text on your Screen. You want to check the Required box so that one of the Multi-Select Checkboxes has to be chosen to move to the next screen. Then you want to create a Choice called “I accept” to be your only Choice for the User. This will allow us to have a validation rule to only login users that accept the Terms & Conditions.
We are on the home stretch now! Lets create a Record Update to do an Update to the Terms & Conditions Last Accepted with the {!Flow.CurrentDateTime}. This will make the User not have to accept the Terms & Conditions again until the Terms & Conditions change.

Great job! Lets now save the Flow and create a Login Flow.
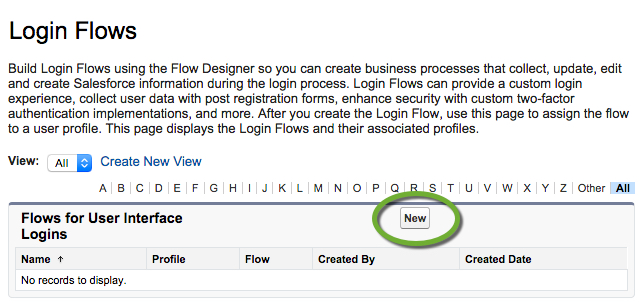
Navigate to the Login Flows (Setup | Security Controls | Login Flows), and create a New Login Flow.
You can only assign one Login Flow connection per Profile. If you want to assign this to multiple Profiles you will have to create multiple Login Flows. You need to know the Flow you want to assign, the License that the Profile uses, and the Profile you want to assign the Login Flow to.

After you have filled in that information hit Save and your Login Flow is LIVE!
