You have the ability now to submit records for approval in Process Builder. This is one of those cases where we pretty much have the same functionality in Process Builder as we do in Visual Flow. So that means, if its a simple submit for approval scenario, Process Builder will be the right tool for you! However, if you need to try and make it more dynamic or simply fit it into an existing Visual Flow that you are using, then this Static Action will be your new best friend!
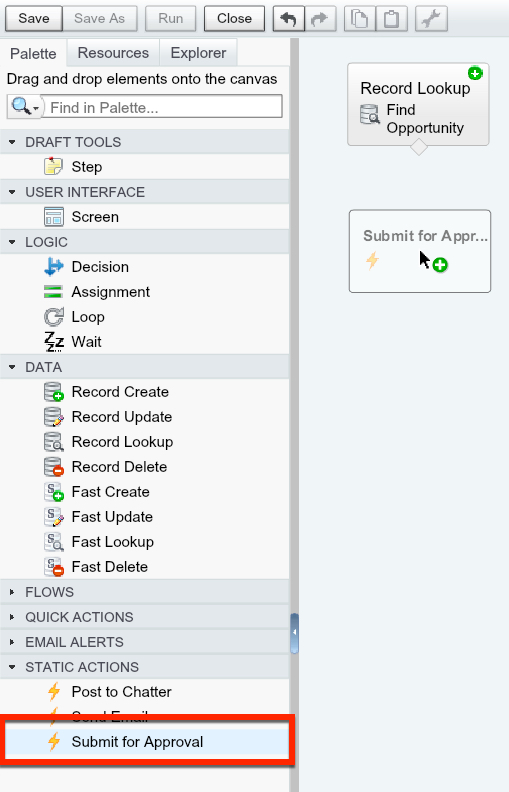
Depending on how many Flows, Quick Actions, and Email Alerts you have in your Salesforce, you might not notice the Static Actions section at the bottom of your Palette. In here you’ll find a list of all three Static Actions. We are going to be using Submit for Approval.
Great, we found our Submit for Approval., so lets drag it onto our Flow’s Canvas.
If you notice, the only thing that is required for us to submit this for approval is the Record ID we want this to be triggered on.
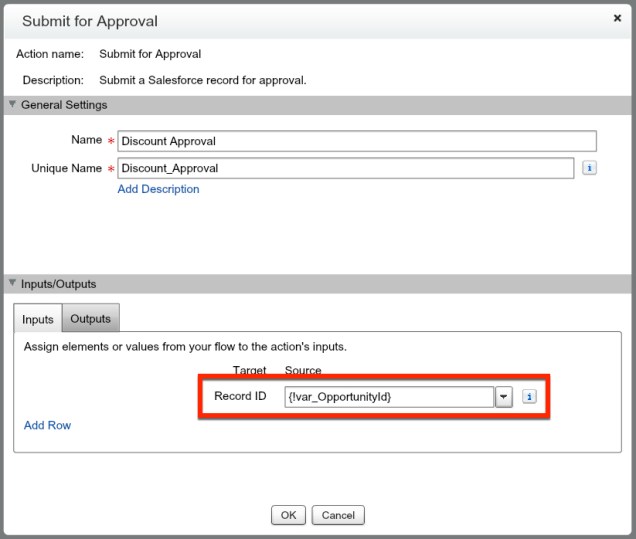
More often than not you’ll want to use some of the additional options with this element.
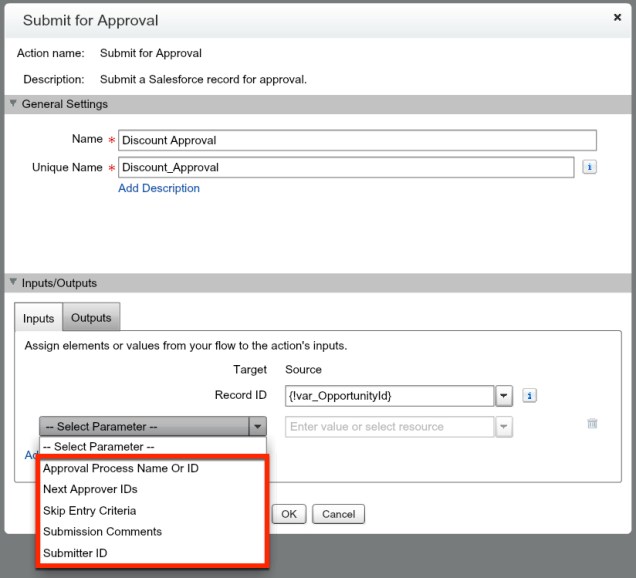
So, lets take a look at what those other parameters are:
- Approval Process Name or ID
- This allows you to enter the approval process Name or ID that you want to start
- Leaving this parameter blank will cause the first Approval Process where the Entry Criteria is met to be selected
- Next Approver IDs
- Can either be a User ID or a Public Group ID
- Skip Entry Criteria
- Allows you to skip the Entry Criteria of your Approval Process
- If you mark this as TRUE, make sure you specify the Approval Process if there is more than one.
- Submission Comments
- If you want to add comments that accompany the submission
- Submitter ID
- The User who is ‘submitting’ the record for Approval
- Default is the Running User
Now we are able to set those parameters and when we hit this element the record will be submitted. The cool part of this is we can also get pretty creative with what happens AFTER it is submitted for approval by using the Outputs tab, and assigning a parameter to a variable to be referenced after the record is submitted.

So, lets take a look at what our Output parameters are:
- Instance ID
- ID of the Approval Process Instance. You can find this Object labeled ProcessInstance.
- Instance Status
- The Status of the Approval. The four values are: Approved, Rejected, Removed, and Pending.
- New Work Item IDs
- A record(s) of work item(s) related to the next step. Note, you can find this Object
- Next Approver IDs
- The next User(s) listed as an approver. Just like the Work Items, this is potentially a collection of Users, so keep that in mind if you’re planning on working with it!
- Record ID
- This is the ID of the record that has been submitted for Approval. Not of much value, which is why you see it listed last 🙂
For a quick summary, if you’re doing something basic with submitting for approval, go with Process Builder! If you’ve got an existing Flow that you want to incorporate Submitting for Approval in, say you’re using a Visual Flow, then this is a great solution for you!
