In Flow we have the ability to re-use certain pieces of functionality that we have created elsewhere. The benefit to this is that we can consolidate the places that we have to make the updates. With a Quick Action in a Flow, we can replicate an Action that we have in our system.
Depending on how many Flows you have in your Salesforce, you might not notice the Quick Actions section at the bottom of your Palette. In here you’ll find a list of all of your Org’s Quick Alerts to choose from. You can find the one that you’re looking for easily by using the Search at the top of the Palette, or by just scrolling down to it if you don’t have many Quick Actions.
We found our Quick Action, so lets drag it onto our Flow’s Canvas.
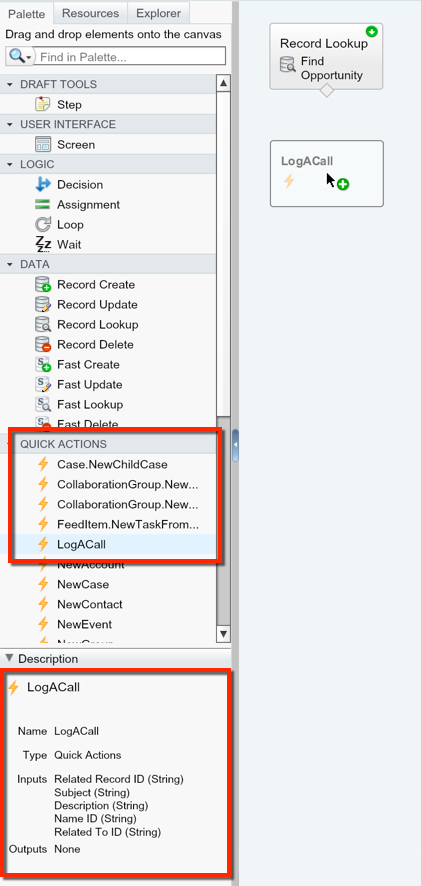
Notice, at the bottom we have the description of our Quick Action. This will give you a quick overview of the fields being referenced in your Quick Action, and an easy way to verify you’re using the correct Quick Action if you have some similarly named.
The thing about using a Quick Action in Flow is that I would argue it only adds more complexity to what could be done with a simple Record Update or Record Create element. However, where this can get interesting is that using a Quick Action in your Flow DOES NOT count against your 50 DATA element limitation. That means, if I wanted to essentially run through over 900 individual Record Creates or Updates via a Quick Action, I could! I wouldn’t recommend doing it in a non-Developer Org, as it does take over 1 minute for the Flow to run…
With that in mind, lets take a look at what our Quick Action looks like when we drag it into our Canvas.
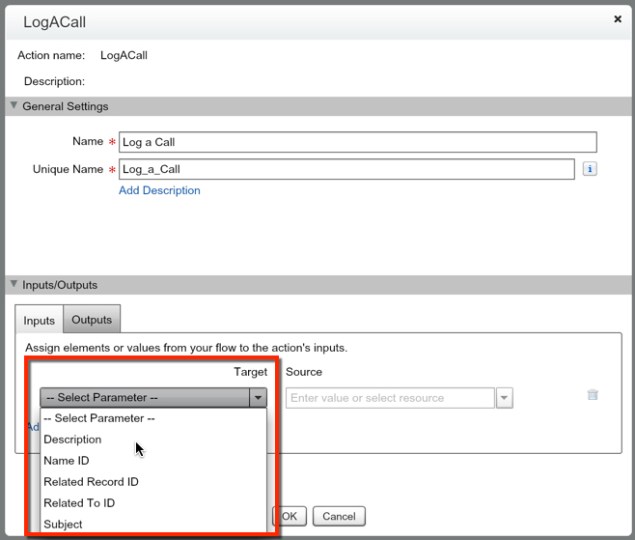
So, I am using the standard Log a Call Quick Action here. If you notice, there are NO required fields for this action. That means, we only have to fill out as many parameters as we want. If I made a field required on the Page Layout, it would look like this:
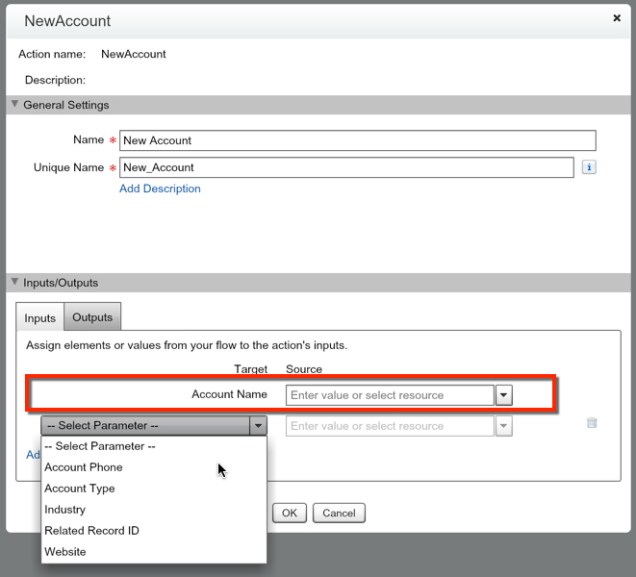
Also, another required field would be the Record ID of any record you’re doing an Update on. This is not any different than if you were to do an update using a Record Update element, so there should be no surprise.
Lets now look at what our Log a Call will look like after we’ve setup the variables from our Flow to be filled out.
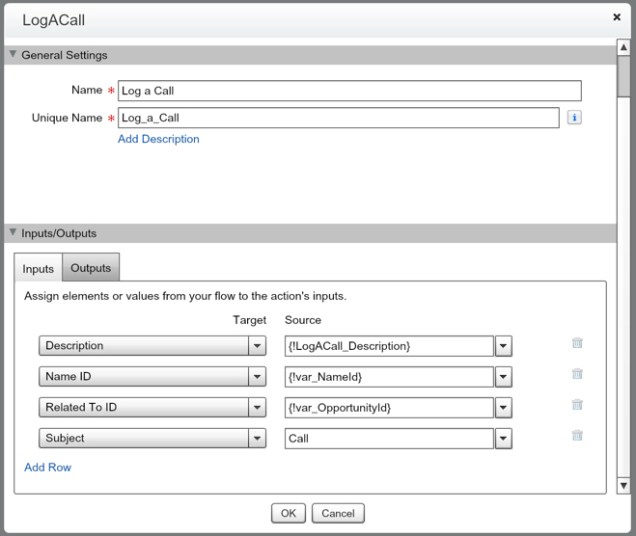
If you notice we have an Outputs tab. In this element there is no option for us to do anything

Now all that is left is to press OK and map this Email Alert to the part of your Flow you need it to send from. Pretty simple and easy to use!
