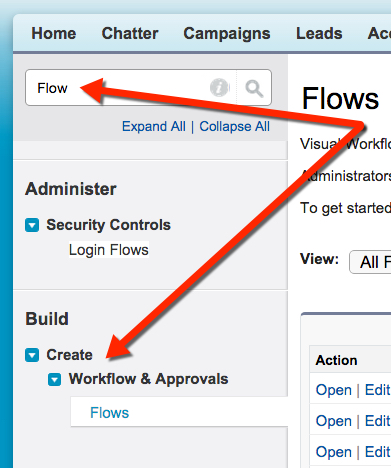
Lets jump right into this by finding where Flows live! First, navigate to the Setup. Then, we can either search for “Flow” in the Setup Search or use the manual method and click through Create –> Workflow & Approvals –> Flows.
Now we are at the “Home Page” of your org’s Flows. From here we see an overview of ALL of our Flows in the org. Below your listed Flows, you can see the Paused and Waiting Interviews. Here we are viewing all of our Flows, and we can easily see which ones are active. If you Create New View and customize your columns, you can add: Unique Name, Is Using an Older Version, Last Modified Date, Namespace Prefix. I find adding Unique Name to your layout helpful.
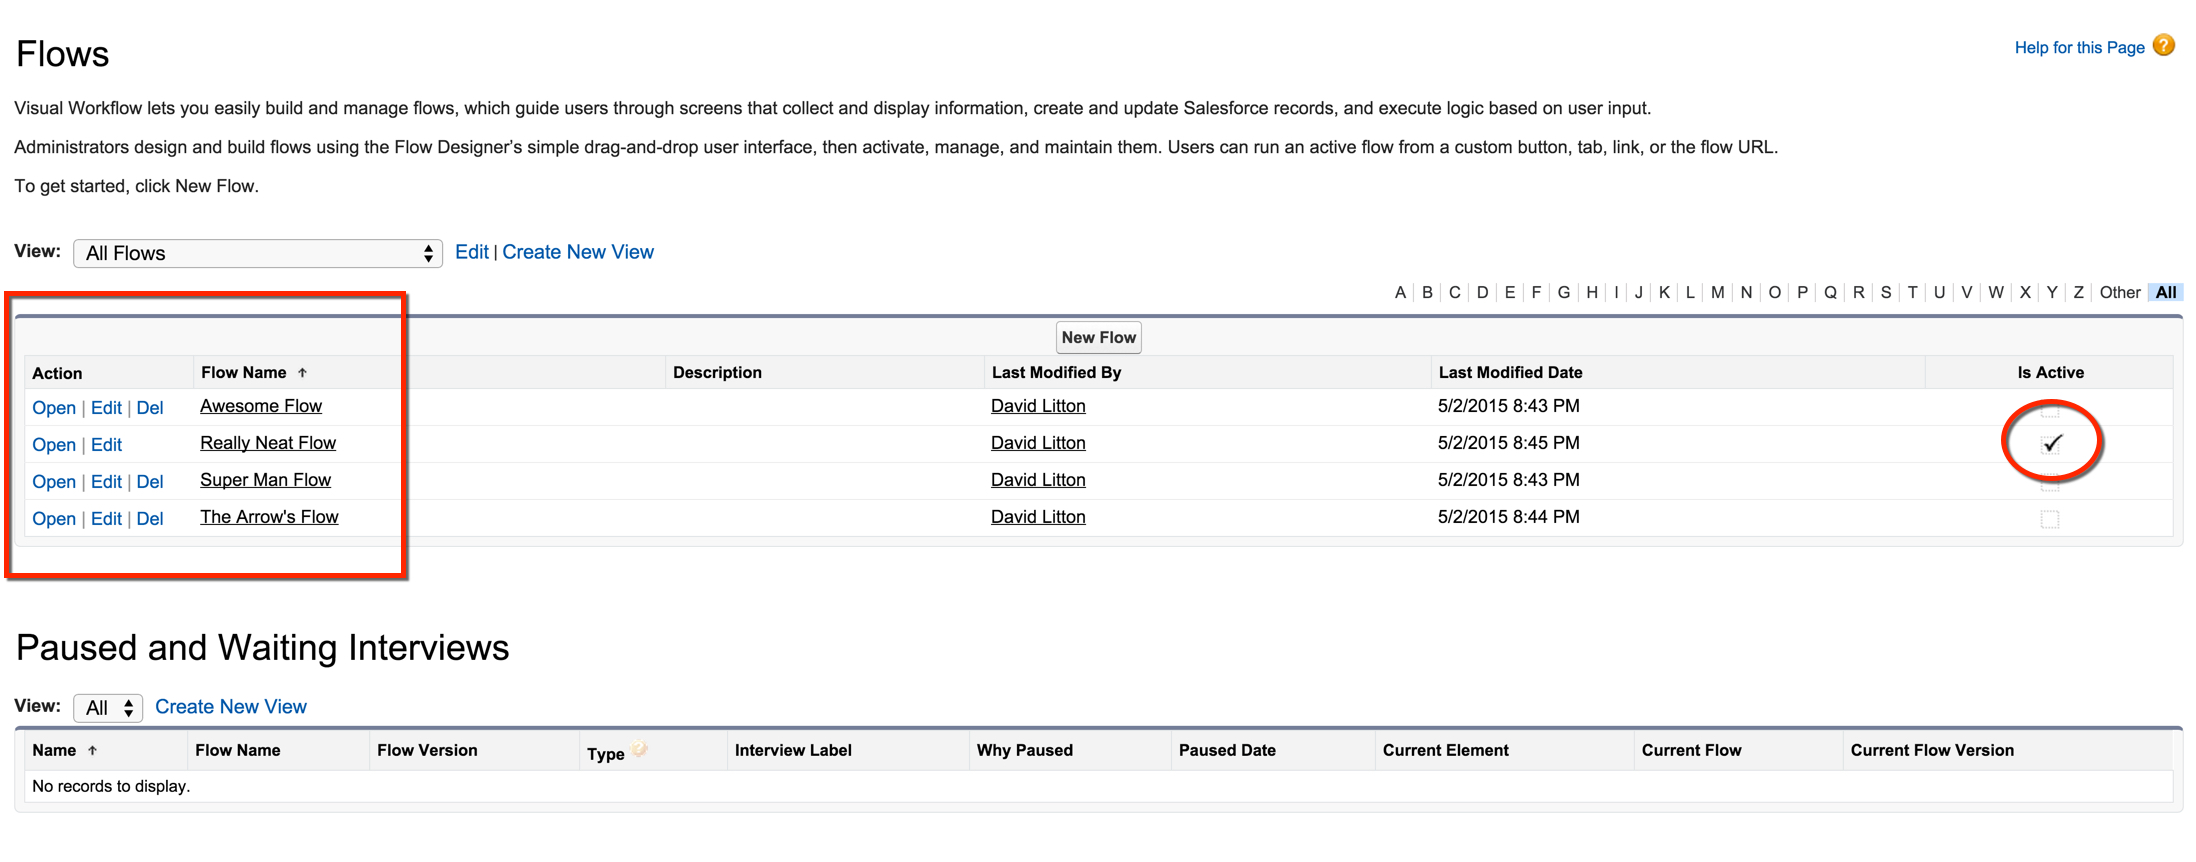
Next to the Flow Name you will see three Actions: Open, Edit, and Delete.
Open – will take you to directly into the Flow Designer. It chooses the Active version of the Flow you are on. If there is no Active version it will default to the Newest Version of the Flow (not the last modified).
Edit – takes you to edit the Flow Name (not API) and the Description. Both of these are what is visible in the List View.
Delete – deletes the Flow. There used to be a 24 hour time delay on deleting Flows that have recently been active, because you have to give all potential users the chance to finish navigating their Flow before it is deleted… however that has been abolished now that Flow & Process Builder have taken over the Salesforce world. Delete the Flow whenever you feel like it now, just be careful as they are not going to be waiting for you in the Recycling Bin!
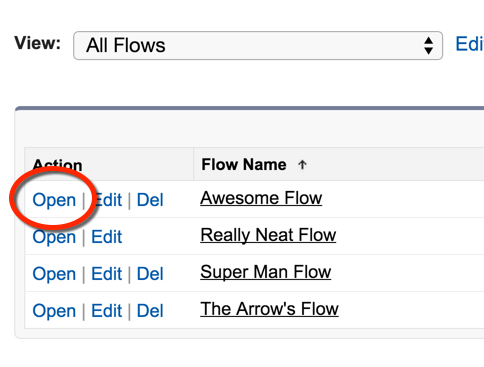
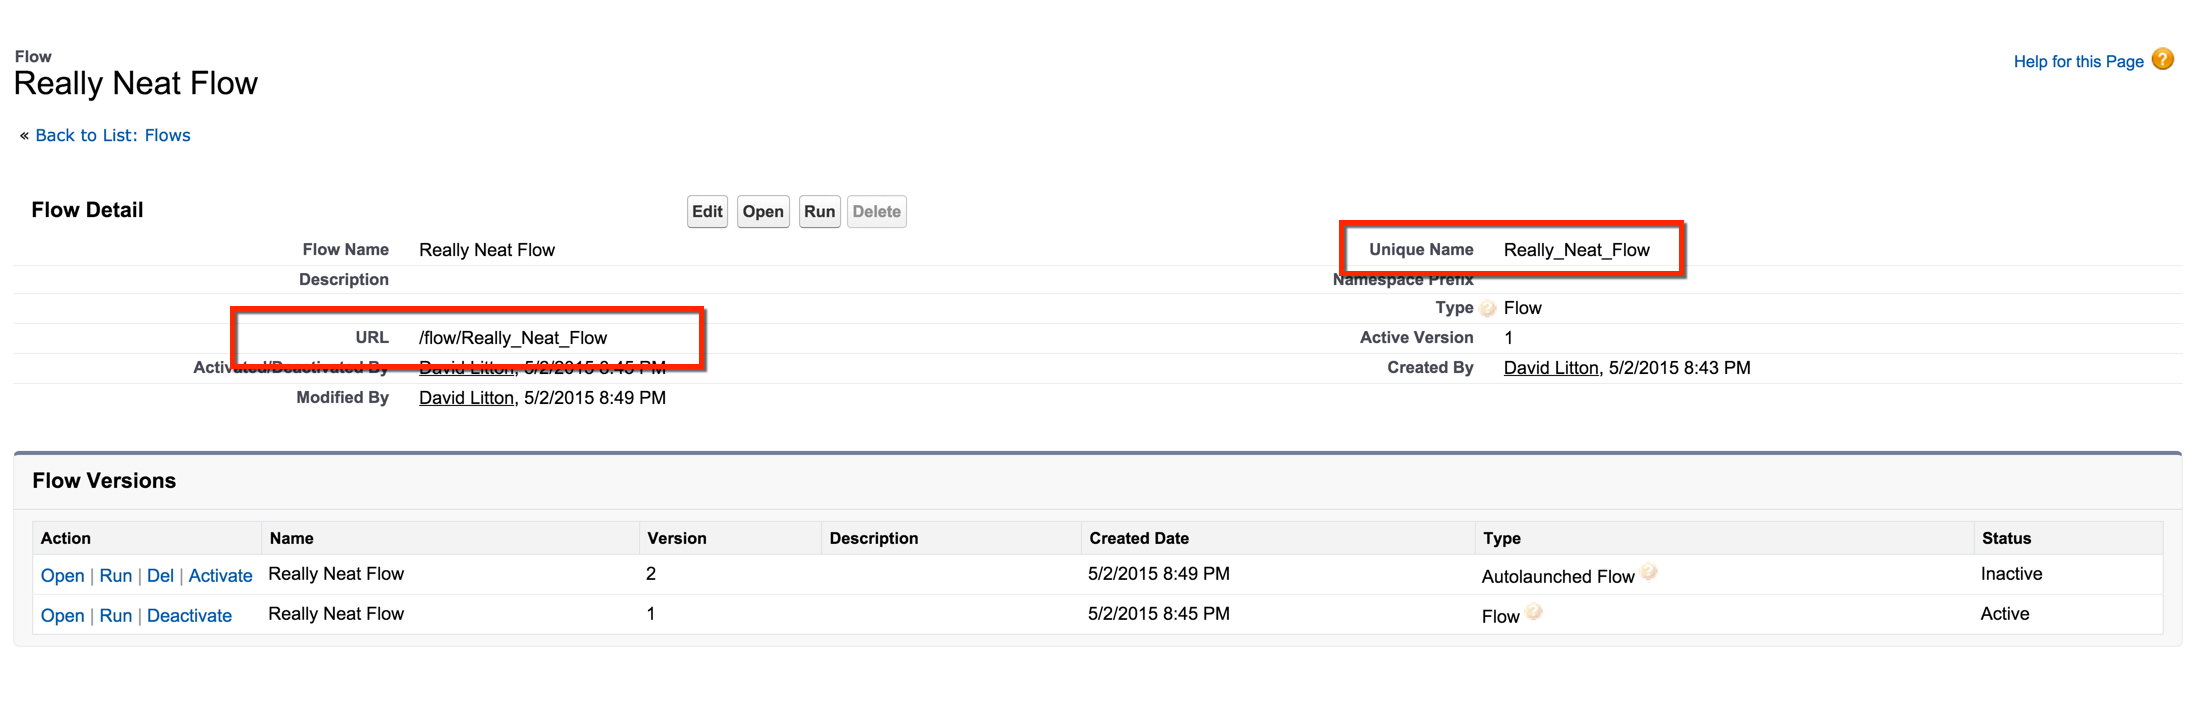
If you were to click on the Flow Name, you will be taken to the Flow view. This is where you have all of the Flow Detail and Version information. One of the great things about Flows is the ability to have version control as you build and troubleshoot.
You will notice that under Flow Versions you have five Actions: Open, Run, Delete, Activate, Deactivate.
Open – opens the Flow Version that you selected in the Flow Designer
Run – runs the Flow from the End User’s perspective. If you are using an Autolaunched Flow it will say YOUR FLOW FINISHED if there are no problems. If you are using Screens, it will take you through the Screens.
Delete – deletes the Flow Version. There is a 24 hour time delay on deleting Flows that have recently been active, because you have to give all potential users the chance to finish navigating their Flow before it is deleted.
Activate – if you have a Flow that is currently inactive, you can select Activate. Now that Flow Version will be the one that your Flow is uses. You may only have one active version of one Flow at a time. Selecting Activate while another version is already active will deactivate the active version.
Deactivate – if you want to turn off a Flow, simply deactivate it and nobody will be able to use the Flow until you re-activate that version or another version.
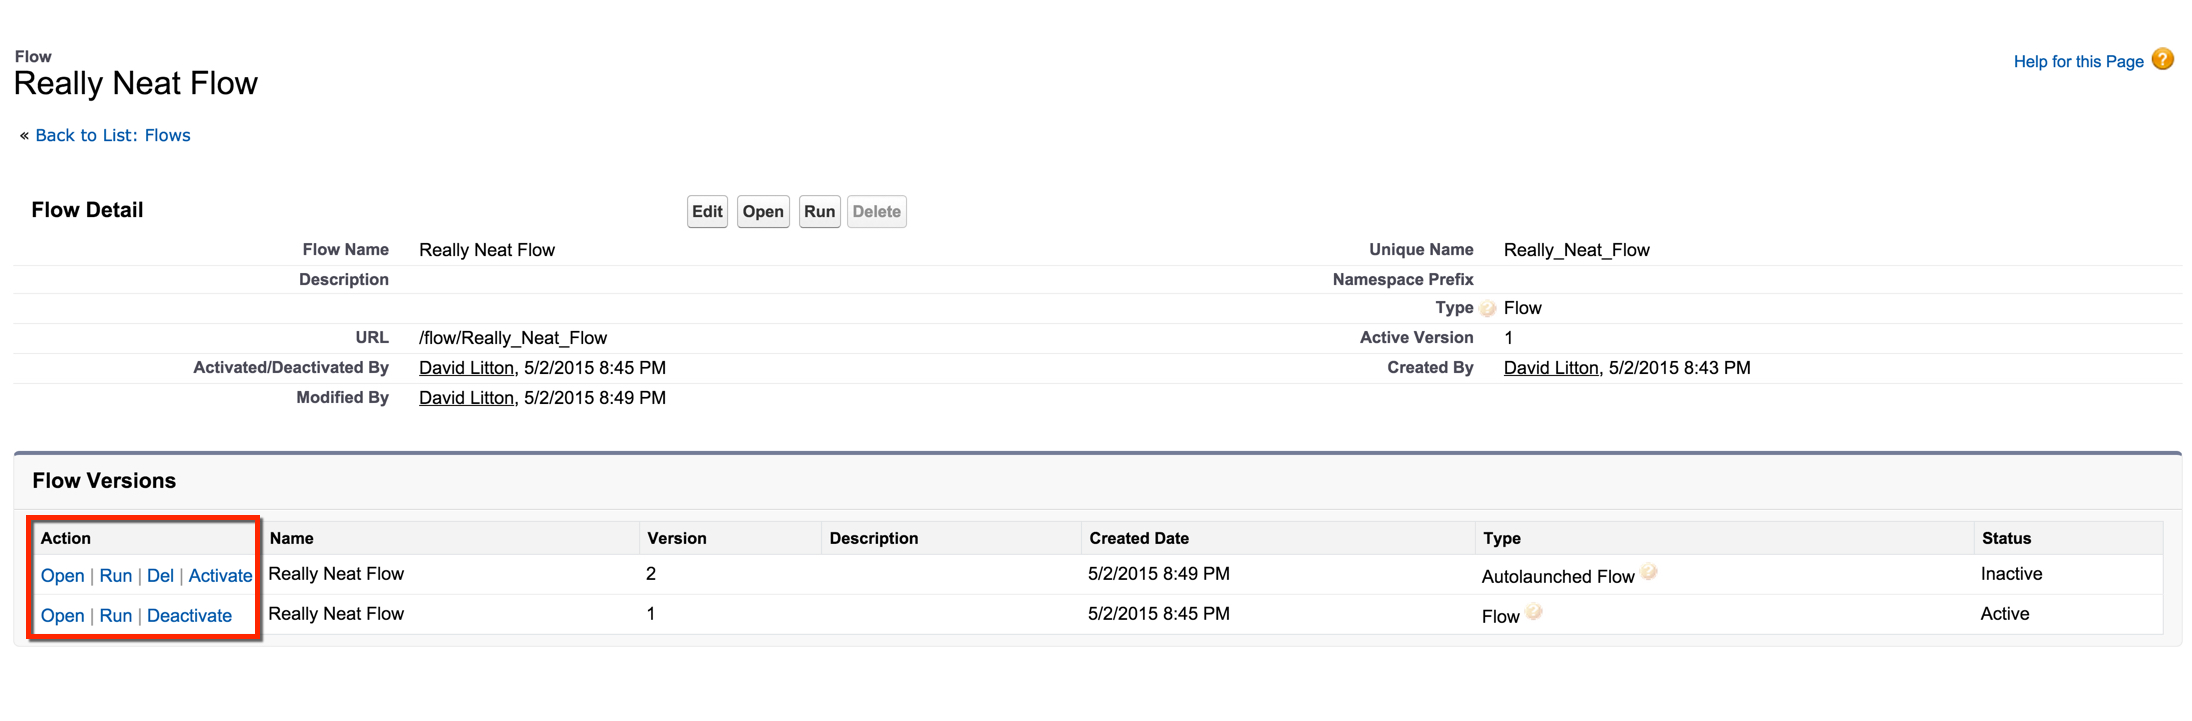
The URL field on your Flow is going to be used when you are placing your Flow on a Button/VF Page. The URL is simply /flow/UNIQUE_NAME. The Unique Name is the Flow’s API name.
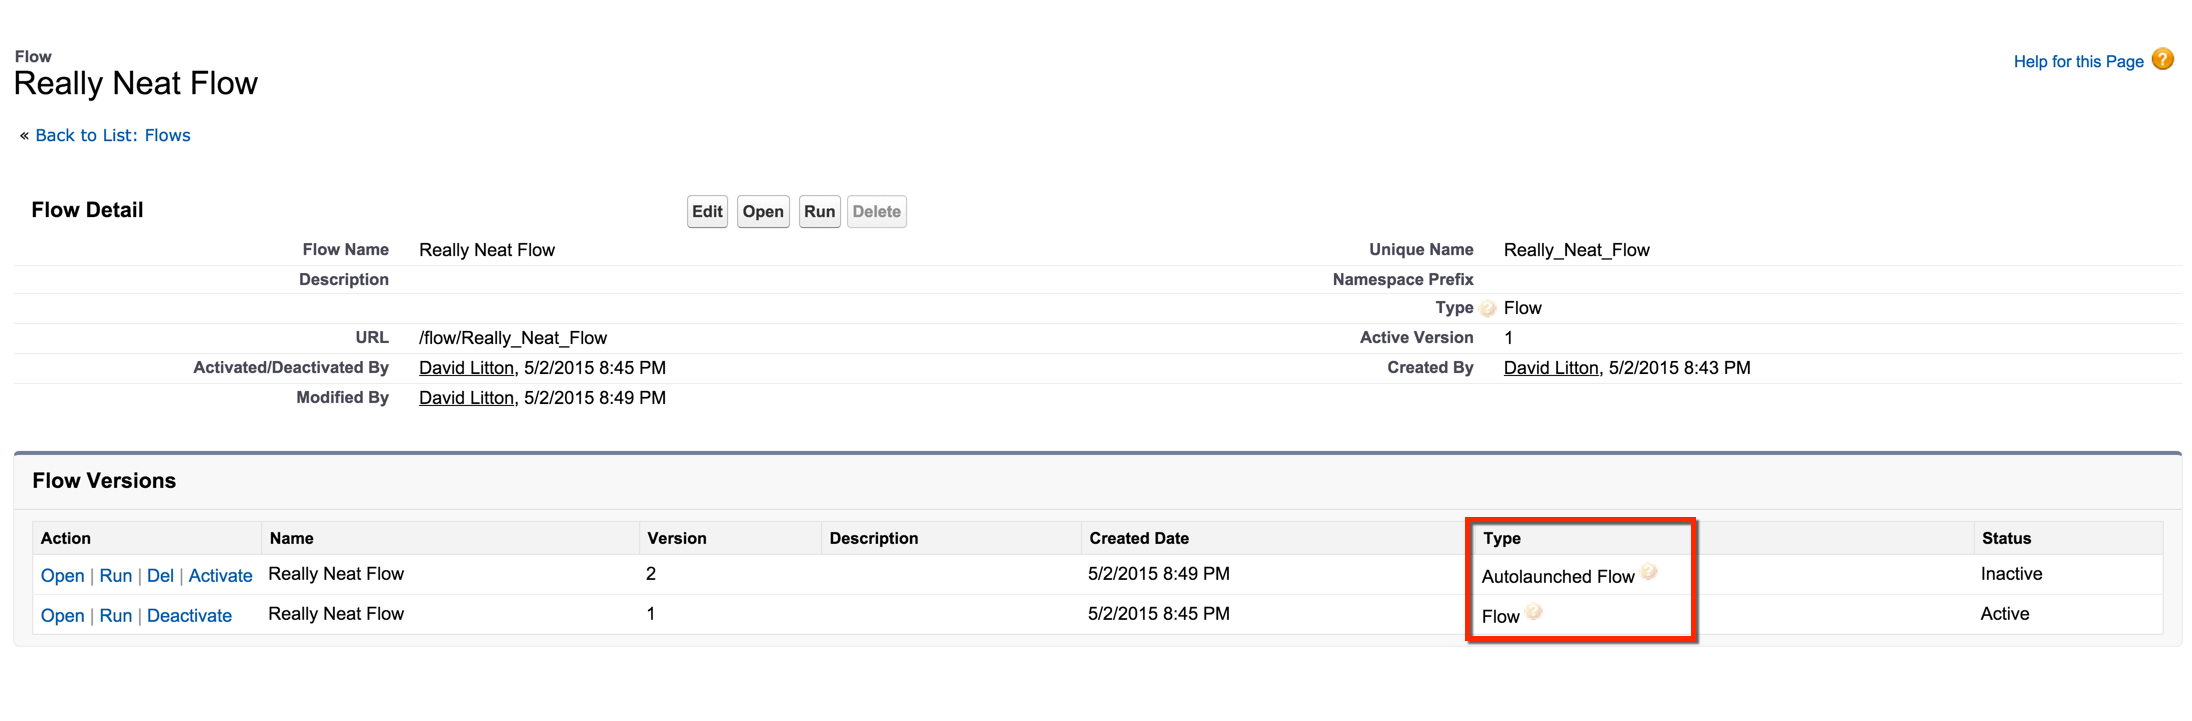
There are two different types of Flows:
Flow – may or may not have a Screen element, but this has to be invoked through user interaction (typically a button & VF page)
Autolaunched Flow – this may not have any Screens on the Flow, and is invoked through a Process Builder action. This means it can only fire after a record is created or edited.
If you have a Flow with many versions, it is important to note the three areas that can help you find the ‘Active’ version of your Flow.

RECAP: Navigating Flows is pretty straight forward! Once you understand the ‘inception-like’ way that they are setup, you will be able to find the area you are looking for quickly. Remember, just like a Workflow or Process Builder, your Flow must be ACTIVE in order to work.
