This is a fun little way to get Latitude and Longitude for US Addresses on any Object in Salesforce. Not everyone has the skills or budget to do a Google API callout and get the Latitude and Longitude for any Object, but this is something that can be solved pretty easily for anyone not dealing with foreign addresses.
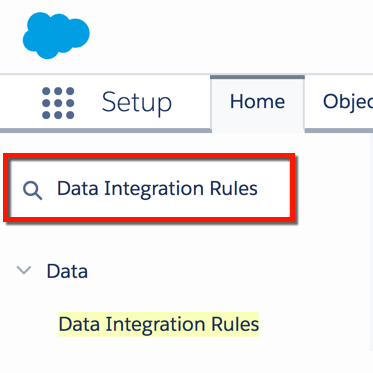
First, we need to turn on Workflow Rules for the Geocoding from Data.com. Go to Setup, and type in Data Integration Rules
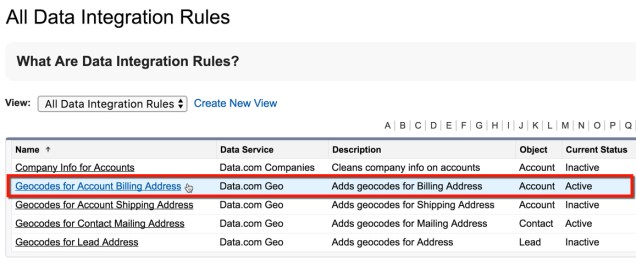
Click on the Geocodes for Account Billing Address. You don’t have to do this on the Account. You can use Lead or Contact instead. I would personally suggest that you use whichever of the Objects has the least amount of automation and/or usage volume around it. If you don’t use Leads at your company, then I would substitute everything “Account” for “Lead”.
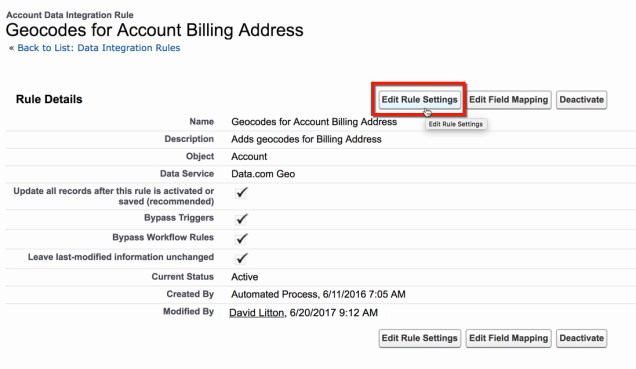
Select Edit Rule Settings.
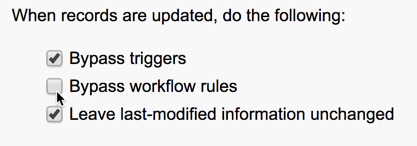
Uncheck the Bypass workflow rules. Salesforce is doing an asynchronous callout to Data.com Geo to get the Latitude and Longitude, and that response from Data.com Geo is not going to happen in the transaction of your Save. It happens quickly after, but it is in a different transaction. You’ll want to ensure you don’t have any recursive issues that might arise where a Workflow fires twice, so test it thoroughly!
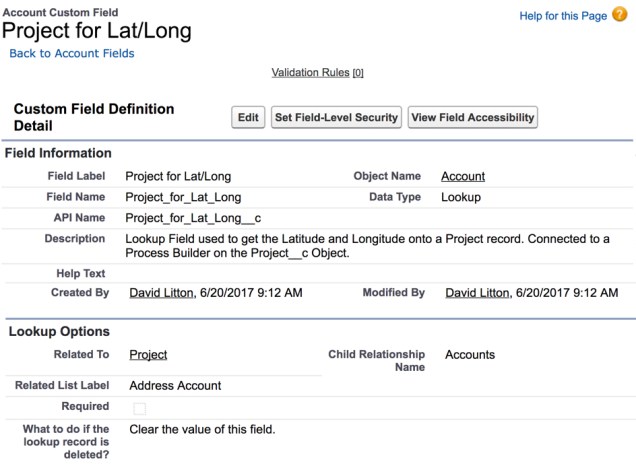
Alright, so we’ve got Data.com Geo all set to go. Now, we need to create a Lookup Field to our Custom Object on the Account. Make it clear what this field is for, and write a description. Keep the FLS minimal, as nobody will need to see this field but the Admin.
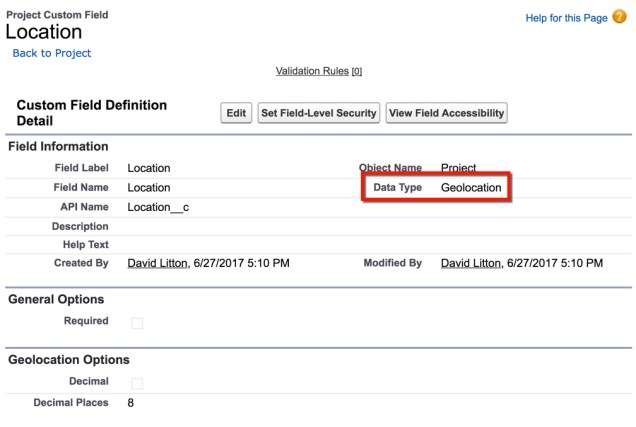
We also need to create a Geolocation field, if you haven’t already, on the Project Object. This will be where you store the Latitude and Longitude values.
Let’s navigate to setup a new Process Builder.
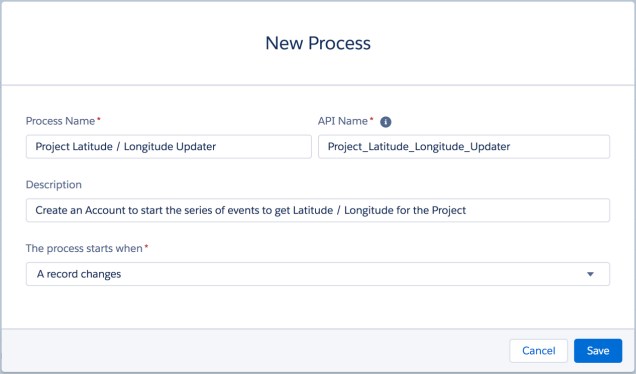
Set Project as the Object this Process Builder runs on.
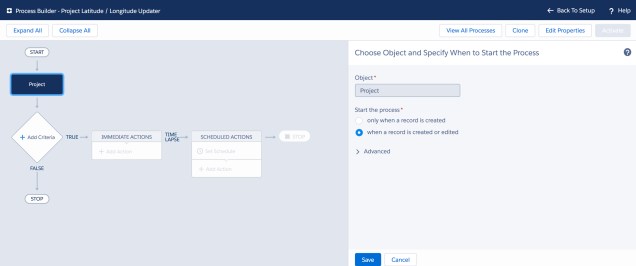
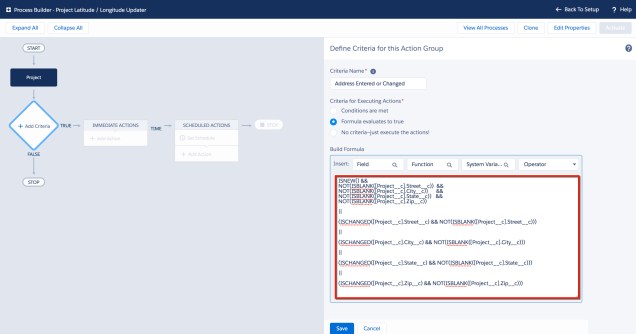
Now, let’s set our Criteria. You want to ensure that this fires when you want it to. I’m accounting for an Address change in my criteria.
Time to setup our Immediate Action of Record Creation (of an Account).

Activate and we’re ready to move to the next item. Creating a Flow that will delete the newly created Account and Update the Project. Then we’re going to create a new Process Builder to launch a Flow.
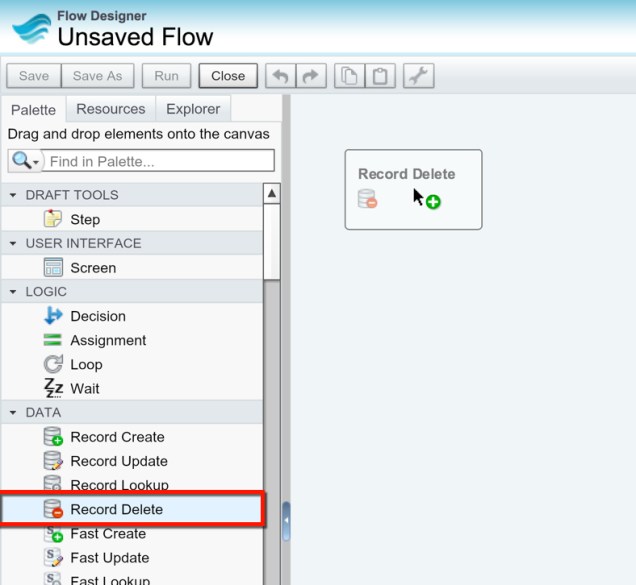
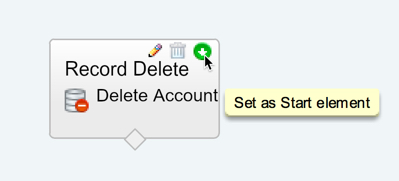
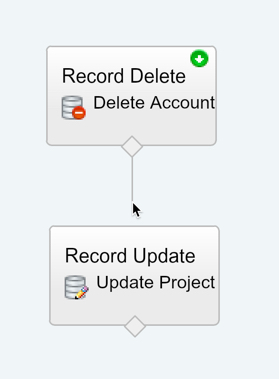
The first element of our Flow will be a Record Delete, to Delete the Account. Drag the Record Delete element out.
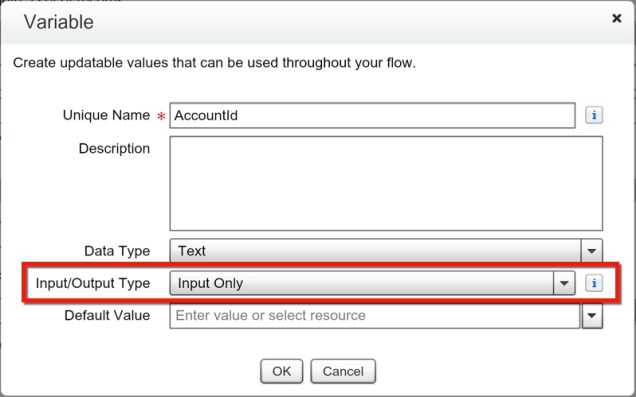
In the Record Delete we’re going to need the AccountId variable that we will pass from our Process Builder to be made as Input Only, allowing that to happen.
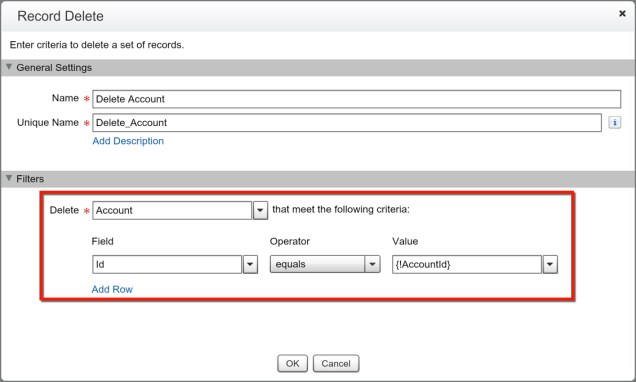
Ensure we the Record Delete is setup correctly and hit Save.
Now, let’s set our Record Delete as the Start Element of our Flow.
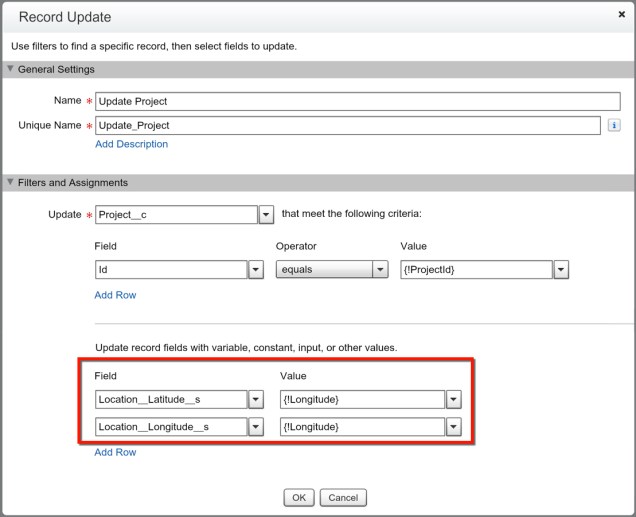
We need to update our Project, so we will drag out the Record Update element.

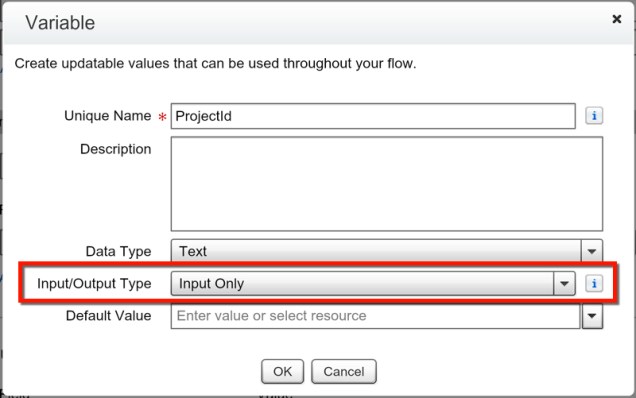
We’ve got a few more variables we need to create. First, let’s create ProjectId and ensure it is marked as Input Only.
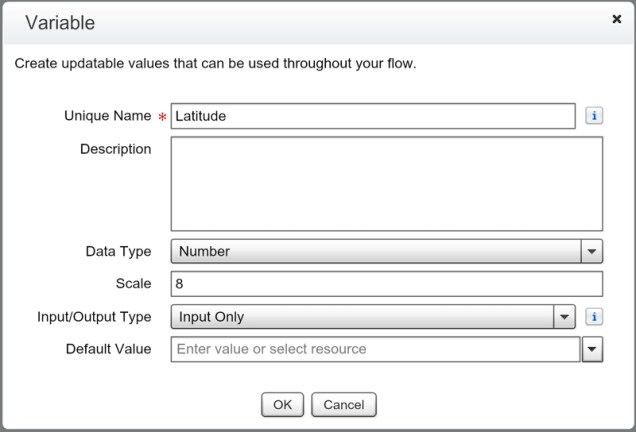
Second, we need to create Latitude and mark it as a Number with a Scale of 8 and Input Only.
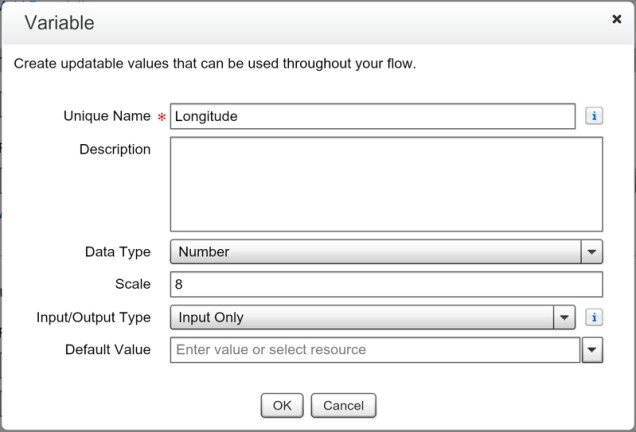
The last variable we need to create is Longitude and mark it as a Number with a Scale of 8 and Input Only.
Let’s fill out the Record Update using these variables.
Hit Save and connect the Elements together.
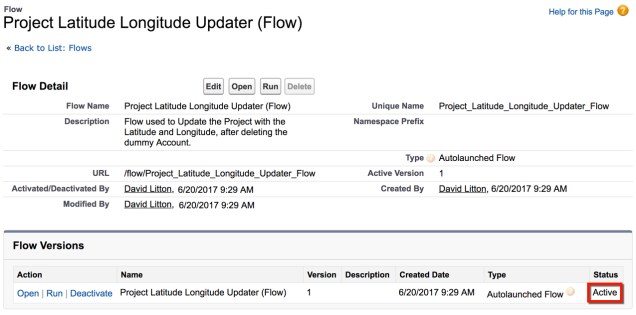
Save your Flow.

Activate your Flow.
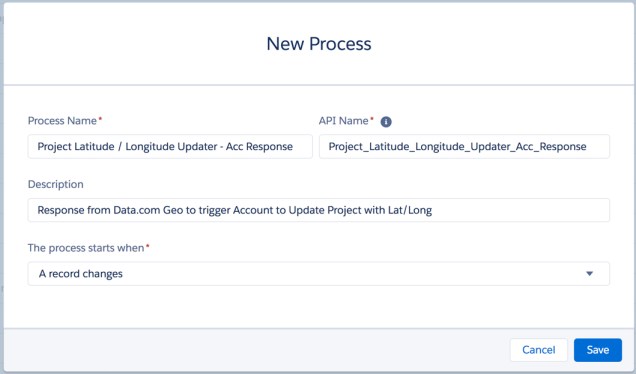
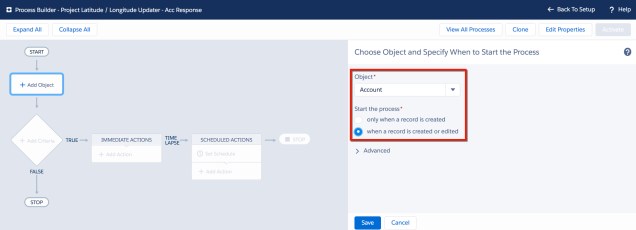
Great, now we’re ready for the last step. Creating our Process Builder to Launch the Flow. Navigate back over to create a new Process Builder.
Select Account as the Object.
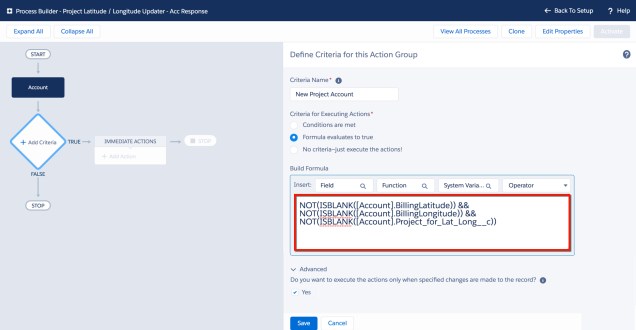
Now, let’s set our Criteria. We’re going to ensure that this only fires when the Project field is filled out, so this doesn’t accidentally fire at random.
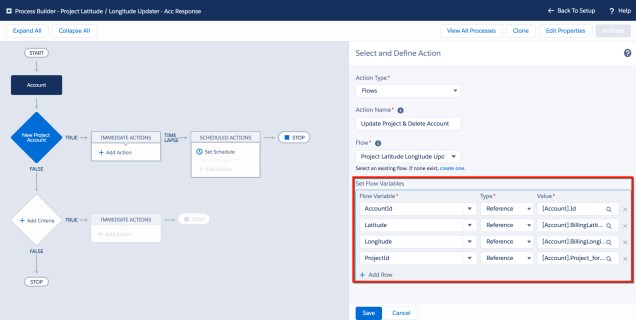
Time to map our Fields inside our Flow Immediate Action.
Save the Immediate Action, and Activate your Process Builder.
Congrats! You now have Latitude and Longitude being populated on your Custom Object for all US Addresses.
