Have you ever come across the scenario where you are wanting to change your redirect URL from the record you were on to a record you just created in Flow? Unfortunately, that is currently not a feature that Flow has for us. Vote for this idea to be a something that won’t require the code/process we are about to go over! But, until this idea gets delivered from Salesforce we need to figure out how to do it ourselves.
Note: This is ONLY possible with a Flow and NOT an Autolaunched Flow. This is because there must be a screen after your variable is created for that variable to be passed into your Visualforce Page. With this disclaimer out of the way, lets get started!
This solution is going to requires that your Flow is already built. We will be building one Apex Controller and one Visualforce Page. You’ll need to have a Button using a Visualforce Page to launch this Flow. If you need a refresher on using a Flow inside a Visualforce Page, take look at this Creating a Visualforce Page (for your Flow) post.
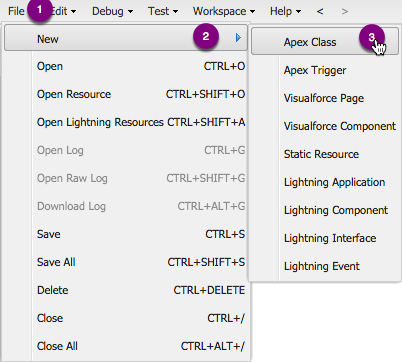
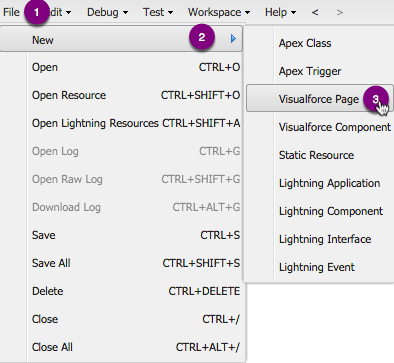
First, we need to navigate to our Developer Console.
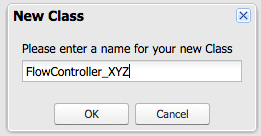
We are going to start off by creating the Apex Class (or your Controller). Go ahead and name this Class whatever you want, but don’t forget to use a naming convention because you could potentially be reusing this type of Controller for multiple Flows.
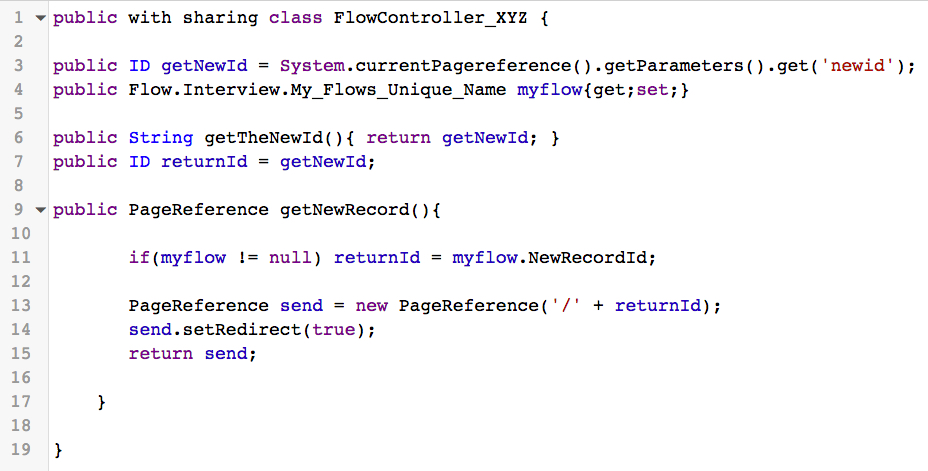
Now, lets go ahead and paste in our boiler plate for this Apex Class, and then we will analyze what is going on in our code and where/how you would go about modifying this.
public with sharing class FlowController_XYZ {

public ID getNewId = System.currentPagereference().getParameters().get('newid');
public Flow.Interview.My_Flows_Unique_Name myflow{get;set;}

public String getTheNewId(){ return getNewId; }
public ID returnId = getNewId;

public PageReference getNewRecord(){

 if(myflow != null) returnId = myflow.NewRecordId;

 PageReference send = new PageReference('/' + returnId);
 send.setRedirect(true);
 return send;

 }

}
Lets take a look at the first part that will change, the Class name. Put in the value that you just used when creating your Apex Class. Remember this name, because we will need to reference it as our Controller in our Visualforce Page later!
The next item that will vary is your Flow’s Unique Name. Remember, this is visible on the Flow Detail. Unfortunately, because of this piece referencing the actual Flow Unique Name, you can’t reuse this Controller for other Flows.
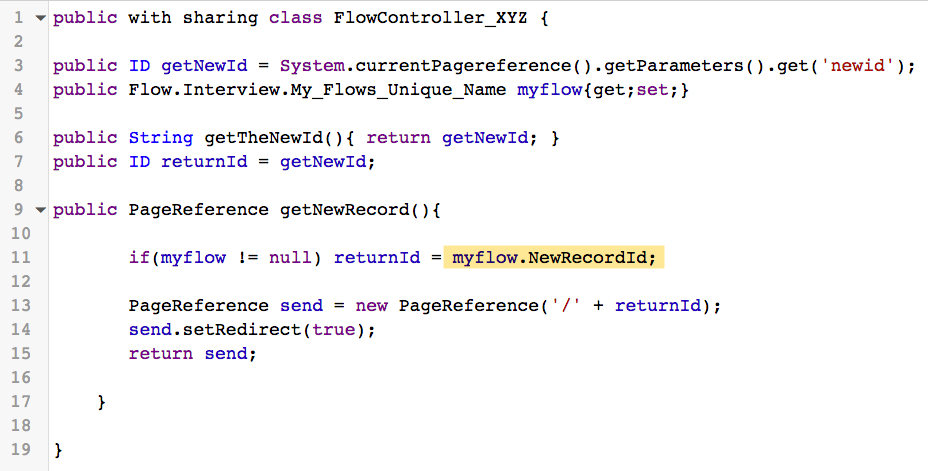
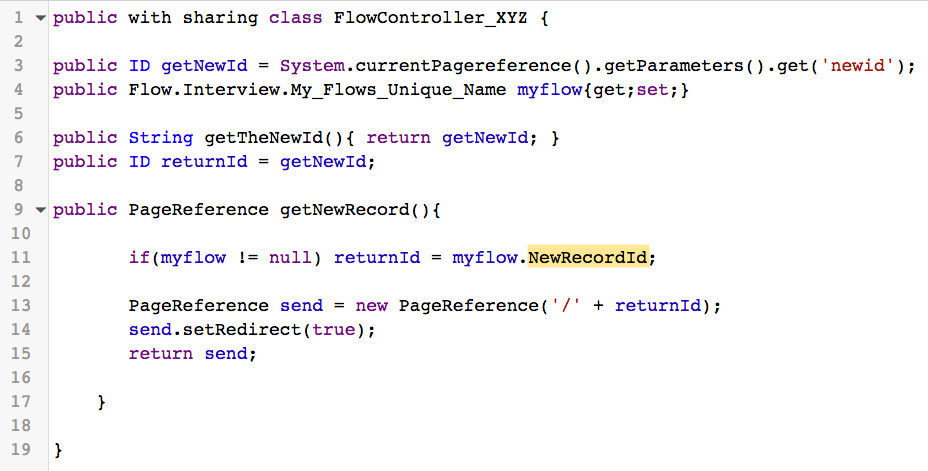
Now, your Apex Class knows what Flow to look in, but we need to tell it what variable to get out of our Flow! So, here is where you would modify the value of the variable to match your ‘new’ Record Id.
As you saw, there is really only two areas in the whole Apex Class that we must modify to get the Class correctly synced with our Flow. Go ahead Save your Class.
Next, we are going to create a Visualforce Page that will house our Flow and grab the variable that our Controller is passing out to us. Remember that the Visualforce Page’s name will be visible in the URL to the end user.
Just like for our Apex Class, lets go ahead and paste in our boiler plate for this Visualforce Page, and then we will analyze what is going on in our code and where you would make your modifications.

<apex:page controller="FlowController_XYZ">
 <flow:interview name="My_Flows_Unique_Name" interview="{!myflow}" finishlocation="{!NewRecord}">
 <apex:param name="UserId" value="{!$User.Id}"/>
 </flow:interview>
</apex:page>
The first area that we want to update is our Controller’s name. This is the name of your Apex Class that you just created! Remember, I told you to remember it for the Visualforce page!

Now, we need to make sure we have the correct Flow being referenced. Make sure the name is equal to our Flow’s Unique Name. You should be able to grab it from your Apex Class really quick if you don’t remember it.

Now, here is the magic of everything! This “NewRecord” is going to stay static. It is referencing “getNewRecord” in our Apex Class. This doesn’t need to modified since it will be passing through the variable’s value we specified in our Apex Class.

If you want to pass any variables into your Flow, this is where you’ll do that. If you want more details on this you can read up in my Creating a Visualforce Page (for your Flow) post.

Now, lets save our Visualforce Page, and we are done! Keep in mind, as mentioned before, you still need to create a Button to send your Users to your Flow’s Visualforce Page.
Credit: This was based off several posts from many people in the community. However the best, which I found actually after writing this is by Kevin Poorman. He even throws in a test class for you! http://goo.gl/h32eQJ. Kevin does some pretty amazing things with Salesforce, be sure to give his blog (http://codefriar.com/) a look! He is truly one of the greats!
RECAP: Passing a new variable out of a Flow is not hard if you follow this simple boiler plate of code. The biggest thing to remember is that you need to have a screen after your Flow creates the variable. If you get that down you’ll be fine!

If I wanted the finish location to be another visualforce page with the new record passed into that page as a variable, what would the new page look like?
LikeLike
Christina, you would need to make the the {!NewRecord} value customized to where it would redirect you to the Visualforce Page, along with the variable passed in through your URL. The Visualforce Page would then need to grab the URL so that it is passed in correctly.
The way you would grab this from your Visualforce Page would be by using something like this: apex:param name=”var_RecordId” value=”{!$CurrentPage.parameters.ID}”
LikeLike